
Understanding Composition
Understanding the Basics of Photography Composition
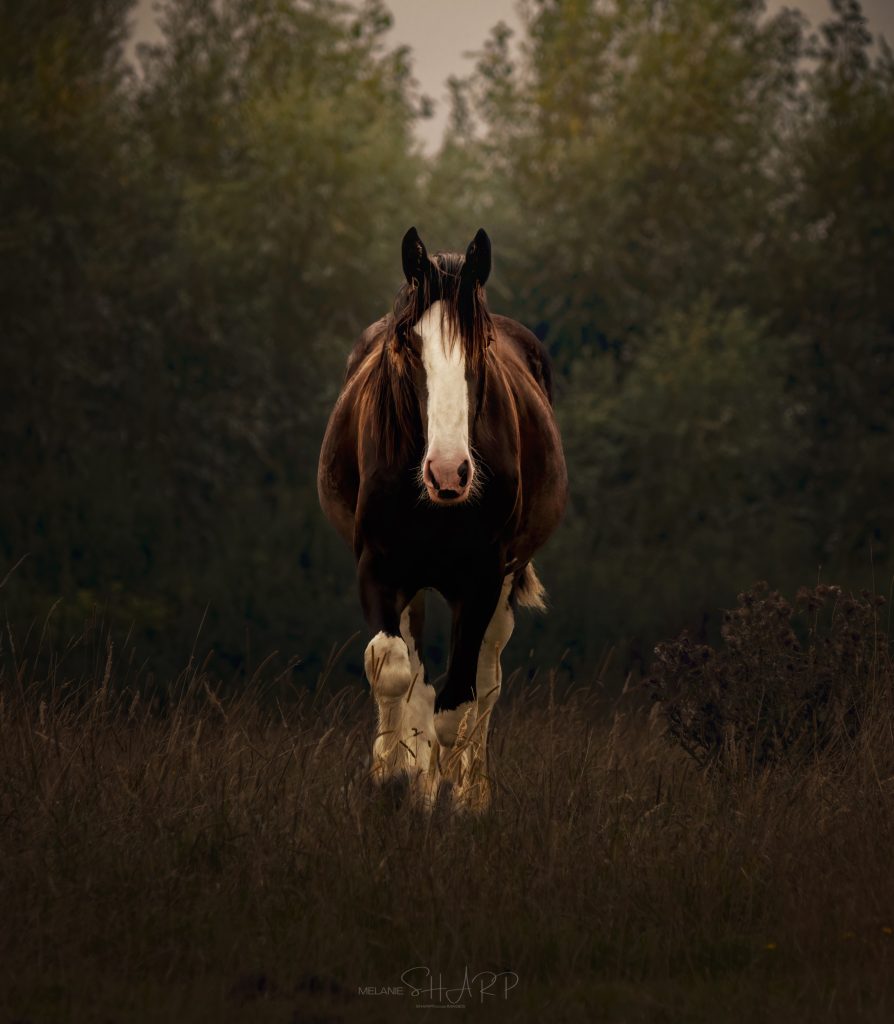
Introduction to Composition: Composition in photography refers to how elements are arranged within the frame. It guides the viewer’s eye and conveys the photographer’s intent. Good composition helps turn a simple snapshot into a visually compelling image, allowing the subject to stand out and evoke emotion or tell a story.
Key Rules and Concepts of Composition
Rule of Thirds
- Definition: The rule of thirds divides an image into nine equal parts by two equally spaced horizontal and vertical lines, creating four intersection points. Placing the subject on one of these points or along the lines creates a more balanced and natural composition.
- Why it works: By avoiding placing the subject directly in the center, the composition becomes more dynamic and pleasing to the eye. This creates tension, energy, and interest.
- How to apply it:
- Enable the grid feature on your camera or phone.
- Position key elements (horizon, focal points, etc.) along the lines or at the intersections.
- Be mindful of where you place the subject, especially when photographing landscapes or portraits.
Exercise: Take a series of photos positioning the subject in the center, then using the rule of thirds. Compare the impact and visual appeal of both.
Balance and Symmetry
- Definition: Balance refers to the visual weight distribution within the image. Symmetry is a special case where both sides of the image mirror each other or feel balanced, creating a sense of order and harmony.
- Types of balance:
- Symmetrical balance: Both sides of the image are equally weighted, often resulting in a calm, harmonious feel. Perfect for architecture or reflective surfaces.
- Asymmetrical balance: Different elements with varying weights create an interesting tension. A large object can be balanced by several smaller objects.
- When to use it: Symmetry often feels pleasing and is suitable for subjects like architecture, reflections, or portraits. Asymmetry adds dynamism and interest, perfect for scenes with multiple subjects or complex backgrounds.
- Exercise: Capture a symmetrical image of a building or a reflection in water. Then, try to balance an image by positioning a smaller object against a larger one in an asymmetrical frame.
Leading Lines
- Definition: Leading lines are visual pathways in an image that direct the viewer’s eye toward the main subject. These can be literal lines (roads, rivers) or implied (shadows, patterns).
- Why it works: Leading lines guide the viewer’s eye through the frame and toward the point of interest, creating a journey within the image. They also add depth and perspective.
- Types of leading lines:
- Straight lines: Roads, pathways, or railways, often used in landscapes and urban photography.
- Curved lines: Rivers, meandering paths, or waves, which create a more relaxed and natural feel.
- Converging lines: Lines that lead toward a single point of interest, enhancing depth.
- Exercise: Look for natural or man-made leading lines in your environment and use them to draw the viewer’s attention to the subject (e.g., a road leading to a mountain).
Depth and Perspective
- Definition: Depth adds a three-dimensional feel to a two-dimensional image, making the scene feel more realistic. Perspective refers to the angle or viewpoint from which the photo is taken.
- Creating depth:
- Foreground, middle ground, and background: Include elements in all three areas to add layers.
- Overlapping objects: When one object overlaps another, it gives a sense of space and distance.
- Aerial perspective: Use changes in color and sharpness to create depth (e.g., mountains fading into the distance).
- Using perspective:
- High angle: Looking down at the subject can make it appear smaller or more vulnerable.
- Low angle: Looking up makes the subject appear larger or more powerful.
- Vanishing point: Capture converging lines (like roads) to create a sense of depth.
- Exercise: Take two photos of the same subject from different perspectives (e.g., from above and below) and see how it changes the mood and message.
Negative Space
- Definition: Negative space refers to the empty or blank space around the subject of the image. It allows the subject to stand out and gives the viewer room to breathe.
- Why it works: Negative space can evoke feelings of simplicity, isolation, or tranquility. It allows the viewer to focus solely on the subject, making it feel more important.
- When to use it: It works well in minimalistic compositions or when you want to emphasize a single subject against a plain or uncluttered background.
Exercise: Take a photo of a subject with a cluttered background and then with a plain one. Notice how the use of negative space changes the impact of the image
Colour and Contrast
Definition: Colour in photography can set the mood, draw attention, or create harmony. Contrast refers to the difference between elements in the image, such as light vs. dark or colours that are opposite on the colour wheel (complementary colours).
- Understanding colour:
- Warm colours (red, orange, yellow) are associated with energy, passion, and warmth.
- Cool colours (blue, green, purple) create a calm, serene, and peaceful mood.
- Monochromatic: Using varying shades of one colour can create harmony and balance.
- Complementary colours: Colours that are opposite on the colour wheel (e.g., blue and orange) create vibrant contrast.
- Using contrast:
- High contrast (e.g., a bright subject against a dark background) creates a striking and dramatic image.
- Low contrast (e.g., pastel colours) results in a softer, subtler image.
- Exercise: Take a series of photos using different colour schemes: one with warm tones, one with cool tones, and one that plays with contrast. Analyse how the choice of colour affects the mood.
Practice Exercise:
- Practice applying each of these composition rules in a variety of settings (landscape, portrait, street photography).
- Choose two of the concepts and deliberately break the rules to see how it affects the image’s impact.
If you would like feedback on this exercise – please email me with your pictures and any written explanation you wish to add and make the email ‘Understanding Composition Exercise’.
In Conclusion
Composition is key to developing a photographer’s eye. While these “rules” guide you, photography is also about creativity and breaking the rules when needed to achieve a unique or artistic effect. Encourage students to experiment and develop their style while keeping these core principles in mind.


Melanie Sharp is a photographer and zootographer, click on the link to fnd out more [link to about us]. These lessons are offered to our members for free. If you would like a copy of this lesson for reference, please email me and i will send you a digital copy for print or storage. Please do not share this content with social media or other people, reproduce it or distribute it. Contact me on [email] for more information and your download link.
Please join me on Instagram, My Portfolio or pop over to our events page for more information on meet-ups, paid membership & in person tuition. I run ‘fun days out with your camera’ at various locations across the country. Check [page] for whats coming up next.