
Auto Focus vs. Manual Focus
Introduction
Focus is one of the most crucial aspects of photography.
Whether you’re capturing portraits, landscapes, or action shots, getting your subject sharp is vital. Modern cameras offer two primary methods for focusing: Auto Focus (AF) and Manual Focus (MF). Both have their advantages and disadvantages, depending on the situation and the photographer’s skill level.
What is Focus?
In photography, focus is the process of making sure the subject of your photo appears sharp and clear, rather than blurry or out of focus. It’s one of the most important parts of creating a strong image because it directs the viewer’s attention exactly where you want it.
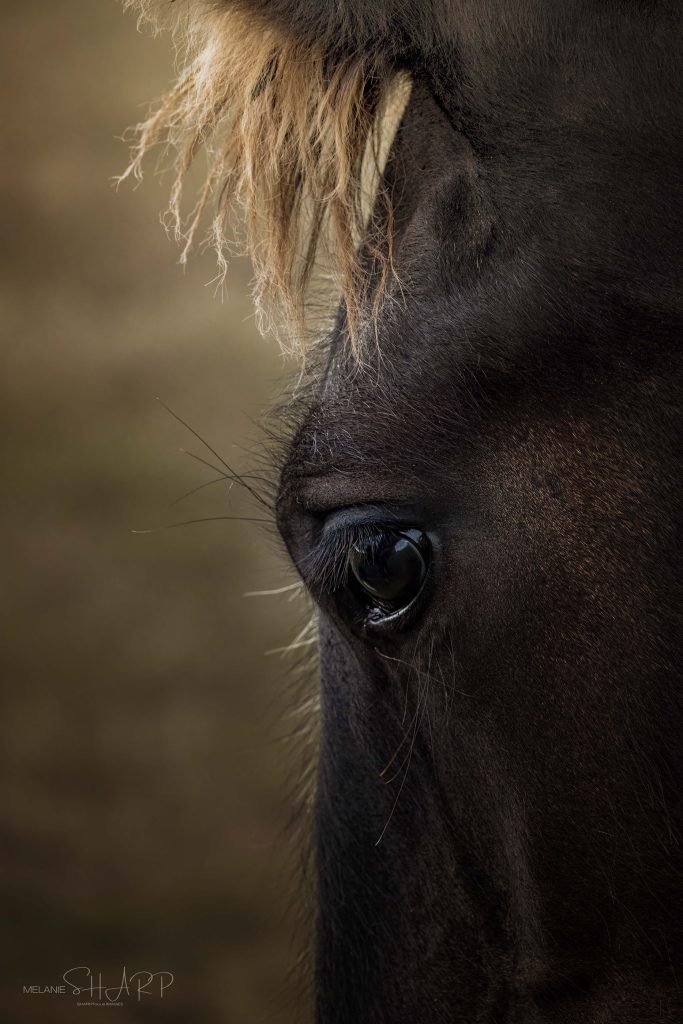
When you focus on a subject, your camera lens adjusts to ensure that area of the photo is sharp, meaning every detail is crisp and easy to see. For example, in a portrait, you’d typically focus on the person’s eyes, so they stand out clearly.
Why Focus Matters:
Draws Attention: Focus helps highlight the subject, guiding the viewer’s eyes to what’s important in your photo. A photo where everything is blurry feels confusing and lacks impact.
Creates Depth: Proper focus adds a sense of dimension. You can choose what to make sharp (in focus) and what to let blur (out of focus) in the background. This creates depth and can make your subject pop against a softer background, which is great for portraits or close-ups of flowers or objects.
Adds Professional Quality: A well-focused image looks polished and intentional. Blurry images often feel accidental or unprofessional unless they’re blurred on purpose to create a specific effect.
By learning how to control focus, you can decide which parts of a scene are sharp and clear and which are softer, giving you more control over the final look of your photos.
AF or MF on most DSLR’s & Mirrorless cameras is selected on the lens by switching between the two.
Tip! Once you are happy with your focusing skills, try out deliberately blurring your photo with ICM (intentional camera movement) or part of the image with Panning or the Kadinsky effect!
Auto Focus (AF)
Auto Focus is a system where the camera automatically adjusts the focus based on what it detects as the subject. Most modern cameras have several AF modes, including single-point, continuous, and tracking modes, making it highly versatile.
How Auto Focus Works:
- Phase Detection AF: This system compares two light beams, adjusting the lens until the beams converge at the focus point.
- Contrast Detection AF: This system moves the lens until the camera detects the highest contrast at the focus point.
Advantages of Auto Focus:
- Speed and Convenience: Especially in fast-moving environments (like sports or wildlife photography), AF quickly locks onto the subject, allowing you to react instantly.
- Accuracy in Action Shots: Continuous or tracking AF can follow moving subjects, keeping them sharp even as they move.
- User-friendly: Ideal for beginners, as it eliminates the need for manual adjustments.
- Modern Features: Many cameras come with face or eye-detection AF, which is highly effective for portrait photography.
Disadvantages of Auto Focus:
- Challenging in Low Light: In low-light situations, AF can struggle to find the correct focus, sometimes leading to ‘hunting’ where the lens moves back and forth.
- Unreliable with Low Contrast: When photographing subjects with little contrast, such as a plain wall or foggy landscape, AF can fail to lock focus.
- Subject Misidentification: The camera may focus on the wrong element, especially when multiple subjects are present.
- Limited Creativity: AF can limit creative focus choices since it often prioritizes the nearest or most obvious subject rather than allowing the photographer full control over focus.
When to Use Auto Focus:
- Action photography (sports, wildlife): Continuous AF ensures your subject remains sharp as it moves.
- Portrait photography: Eye-detection AF ensures the subject’s eyes remain the focal point.
- General photography: Landscapes or casual street photography benefit from the convenience of AF.

Manual Focus (MF)
Manual Focus gives you complete control over where the camera focuses. It requires you to adjust the lens manually until the subject appears sharp.
How Manual Focus Works:
- You turn the focus ring on the lens to bring the subject into focus. Many modern cameras offer focus assist features, like magnification or focus peaking, to help with precision.
Advantages of Manual Focus:
- Creative Control: You decide exactly what part of the image should be in focus, allowing for more creative compositions.
- Challenging Light Conditions: In low light or with low contrast subjects, MF can outperform AF, as you are not relying on the camera’s sensor.
- Macro Photography: When shooting close-up, especially at a very shallow depth of field, manual focus allows for more precision.
- Fine-tuning for Landscapes: When capturing landscapes, MF ensures perfect focus from foreground to background, especially when using hyperfocal distance techniques.
Disadvantages of Manual Focus:
- Slower: It takes time to adjust, which can result in missed shots, especially with moving subjects.
- More Difficult for Beginners: Without experience, it can be challenging to get the focus right, leading to blurry images.
- Requires Good Eyesight: If you’re relying solely on the viewfinder or LCD, it can be hard to tell when an image is perfectly sharp.
- Less Effective for Fast-moving Subjects: In dynamic environments like sports or wildlife photography, manual focusing can slow you down and cause missed opportunities.
When to Use Manual Focus:
- Macro photography: Precision is essential when dealing with extremely shallow depth of field.
- Landscapes: Manual focus allows you to set your focus point carefully for maximum sharpness across the scene.
- Low contrast or tricky lighting: Manual focus lets you overcome the limitations of AF in low-light or low-contrast situations.
- Creative compositions: When you want to deliberately focus on an unconventional subject or part of the frame.

Practical Tips
Auto Focus Tips:
- Use Single-Point AF for precise focusing on one subject, like in portrait photography.
- Use Continuous AF when tracking a moving subject (sports or wildlife).
- For low-light situations, use the camera’s AF assist light or focus on areas with more contrast to help the AF system.
Manual Focus Tips:
- Use focus peaking if your camera has it, to highlight the areas in focus.
- In challenging light conditions, magnify the live view to ensure sharpness.
- Practice manual focus with stationary subjects to get used to how it works.
Practice Exercise
Exercise 1: Mastering Auto Focus
- Go to a park and photograph moving subjects (e.g., people, pets, or birds) using Continuous AF mode. Experiment with different focus areas, such as single-point, zone, and tracking.
- Review your photos and check if your subject is sharp. Did the AF track correctly? What would you change?
Exercise 2: Perfecting Manual Focus
- Set up a simple still life at home (e.g., a mug and a book). Use Manual Focus to carefully adjust the focus on different parts of the scene (e.g., the mug handle or the text on the book).
- Try this in both low-light and well-lit situations to understand how MF performs differently in various conditions.
Exercise 3: Comparison Challenge
- Pick a landscape scene with a wide depth of field. Take two photos: one using AF and another using MF. Compare them and notice the difference in sharpness and control.
If you would like feedback on this exercise – please email your pictures and any written explanation you wish to add to me, title it as ‘Auto vs Manual Exercise’, and i will get back to you. This service is free, but limited to a general overview. For a more in depth critique and discussion of your work, please book a 1to1 session with me.
Conclusion
Both Auto Focus and Manual Focus are essential tools in a photographer’s arsenal. Auto Focus is convenient and quick, perfect for dynamic, fast-paced photography, while Manual Focus offers greater control and precision for challenging or creative situations. Understanding when and how to use each will significantly improve your ability to capture sharp, well-focused images.
Melanie Sharp is a photographer and zootographer, click on the link to fnd out more [link to about us]. These lessons are offered to our members for free. If you would like a copy of this lesson for reference, please email me and i will send you a digital copy for print or storage. Please do not share this content with social media or other people, reproduce it or distribute it. Contact me on [email] for more information and your download link.
Please join me on Instagram, My Portfolio or pop over to our events page for more information on meet-ups, paid membership & in person tuition. I run ‘fun days out with your camera’ at various locations across the country. Check [page] for whats coming up next.